Let’s be honest: store-bought granola bars are fine. They’re convenient, they’re there, they do the job. But fine is not what we’re after here. These homemade granola bars are the real deal—chewy, crunchy, perfectly sweet, and packed with exactly the things you love.
No weird ingredients, no preservatives, no mystery “natural flavors.” Just oats, nuts, dried fruit, honey, and a little magic. They come together in one bowl, require absolutely no baking, and are endlessly customizable.
Want chocolate chips? Add them. Prefer almonds over pecans? Go for it. Craving a little sea salt on top? You’re in charge. Snack time just got a serious upgrade.
The Secret to Bars That Hold Together (No Crumbling Allowed)
The biggest challenge with homemade granola bars is getting them to actually stay in bar form instead of becoming delicious granola rubble. The secret is the binder. A combination of honey (or maple syrup) and nut butter, gently heated, creates a sticky, glorious glue that holds everything together.
The other secret? Packing them down firmly. When you press the mixture into the pan, you need to apply serious pressure—like, really lean into it. A flat-bottomed measuring cup or glass is your best friend here. The more compact the mixture, the better the bars will hold together.
And finally, chill thoroughly. These bars need time in the fridge to set up properly. Patience is rewarded with perfect, sliceable, portable granola bars.
Instructions
Line Your Pan
Line an 8×8-inch (or 9×9-inch) baking pan with parchment paper, leaving overhang on two sides for easy removal. This is non-negotiable—you’ll thank yourself later .
Toast the Oats and Nuts (Optional but Recommended)
For deeper flavor, spread the oats and chopped nuts on a baking sheet and toast at 350°F (175°C) for 8-10 minutes until fragrant and lightly golden. This step is optional but adds so much .
Combine Dry Ingredients
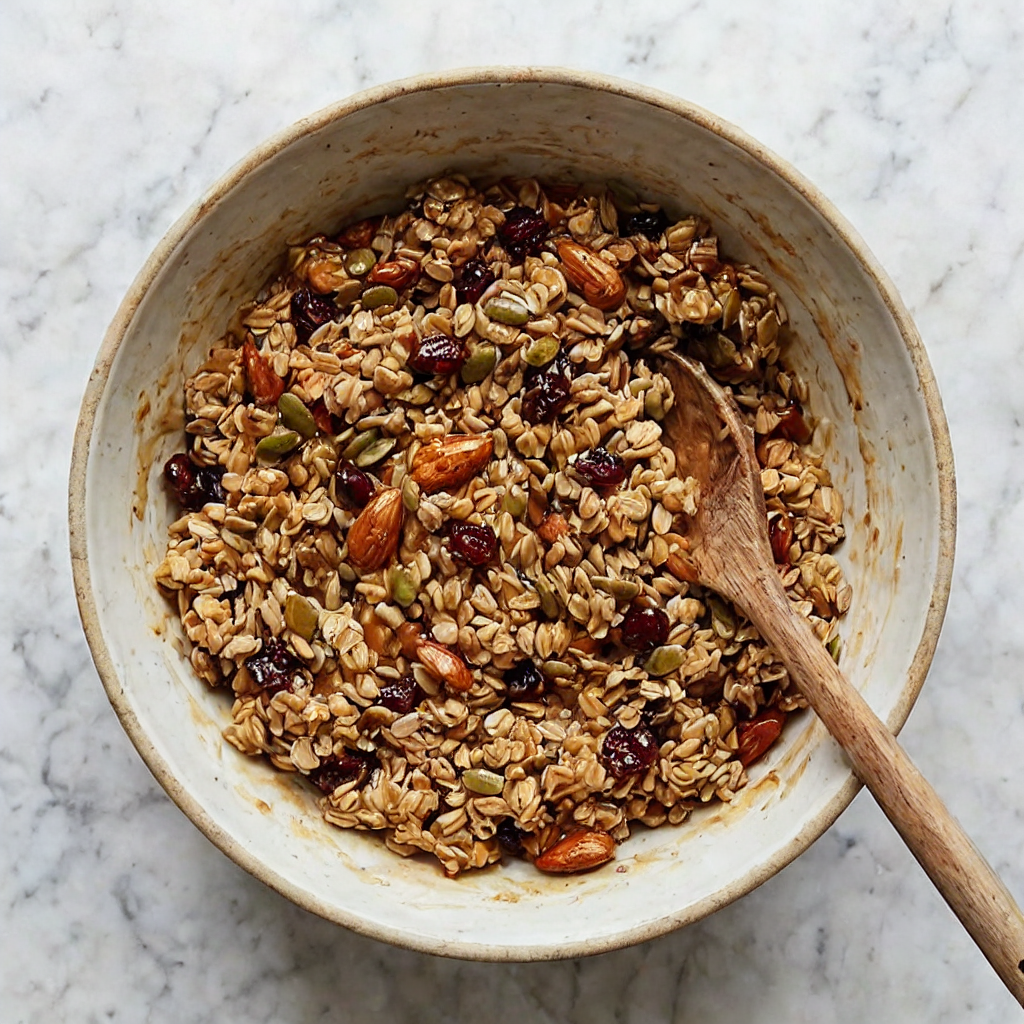
In a large bowl, combine the toasted oats and nuts, seeds (if using), dried fruit, salt, and cinnamon. Stir until evenly mixed .
Heat the Binder
In a small saucepan over medium-low heat, combine the honey (or maple syrup) and nut butter. Warm gently, stirring constantly, until the mixture is smooth, runny, and well combined. Do not boil. Remove from heat and stir in the vanilla extract .
Combine Wet and Dry
Pour the warm nut butter mixture over the dry ingredients. Stir vigorously with a spatula until everything is evenly coated. The mixture will be thick and sticky—this is good .
Add Chocolate Chips (If Using)
If you’re adding chocolate chips, let the mixture cool for 5-10 minutes first, or they’ll melt completely. Then fold them in gently .
Transfer to Pan
Scrape the mixture into the prepared pan. Spread it as evenly as possible with the spatula .
Press FIRMLY
This is the most important step. Place a piece of parchment paper over the mixture and use a flat-bottomed measuring cup or glass to press down firmly and evenly. Really lean into it. The more compact, the better the bars will hold together. Pay special attention to the edges and corners .
Chill
Refrigerate for at least 2 hours, preferably 3-4, until completely firm and set. Don’t rush this step .
Slice
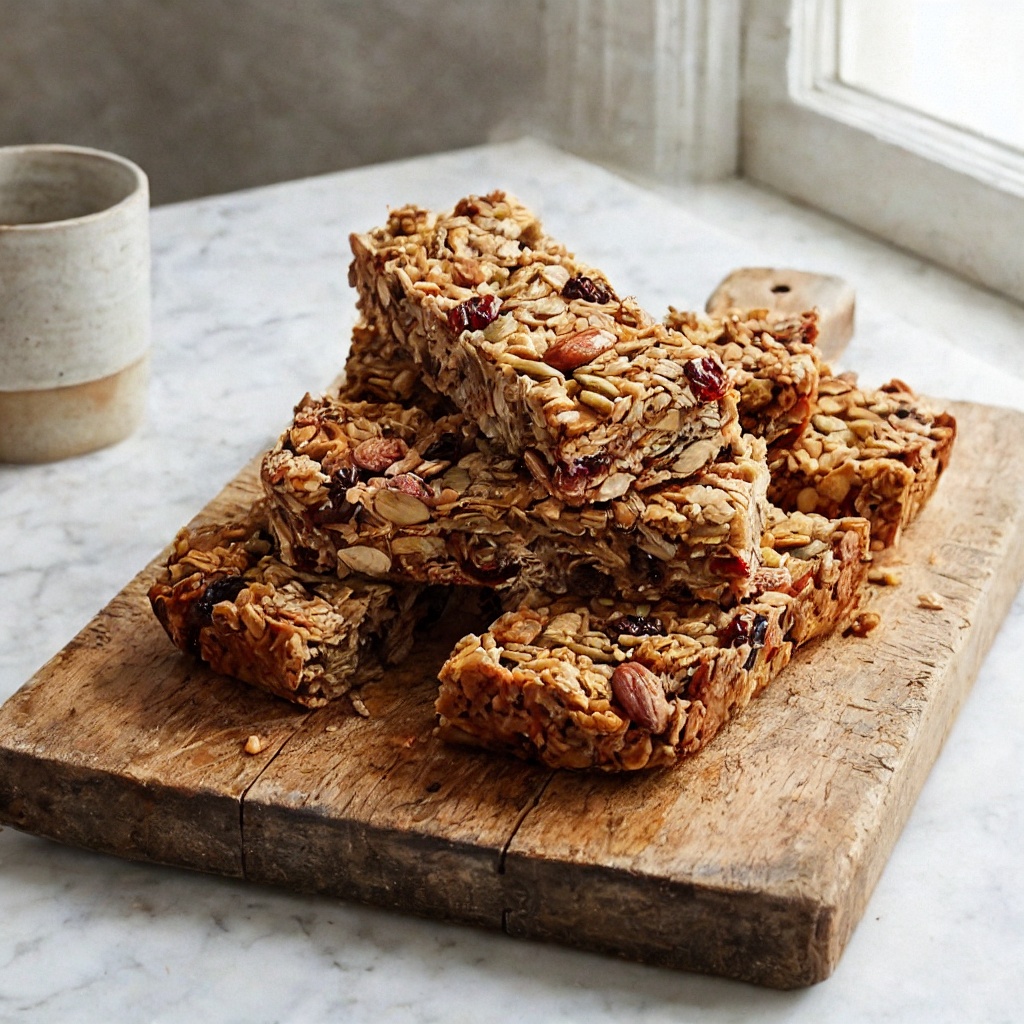
Use the parchment overhang to lift the entire block out of the pan. Place on a cutting board and use a sharp knife to slice into bars or squares. A serrated knife works well with a gentle sawing motion .
Store
Store bars in an airtight container in the refrigerator for up to 2 weeks, or at room temperature for up to 5 days. They also freeze beautifully for up to 3 months .
Enjoy
Grab one on your way out the door, pack it in a lunchbox, or crumble it over yogurt for breakfast .
Pro-Tips for Granola Bar Greatness
- Press. Press. Press. The number one reason granola bars crumble is insufficient pressing. Really pack that mixture down
- Don’t Skip the Chill: These bars need time in the fridge to set up. Rushing leads to crumbly sadness
- Customize Freely: This recipe is a template. Swap nuts, seeds, dried fruits, and add-ins based on what you love or what’s in your pantry
- Warm Honey = Sticky Success: Heating the honey and nut butter creates a better binder. Don’t skip this step
- Chocolate Chips at the End: Add them after the mixture has cooled slightly, or they’ll melt into a chocolate swirl (which is also delicious, but not what we’re going for here).