Let’s be honest: making your own yogurt sounds like something that requires a degree in microbiology or at least a very intimidating piece of equipment. But here’s the truth: homemade yogurt is nothing short of magic, and you are absolutely the wizard. All it takes is milk, a little store-bought yogurt to get things started, a pot, a jar, and some patience. That’s it.
No fancy machines, no complicated techniques. Just you, transforming plain old milk into thick, creamy, probiotic-rich yogurt that tastes better than anything you can buy. It’s cheaper, you control the ingredients, and there’s something deeply satisfying about eating food you made with nothing but heat and time. Ready to feel like a wizard? Let’s do this.
The Science of Yogurt: How Milk Becomes Magic
Yogurt-making is a beautiful example of friendly bacteria doing amazing things. When milk is heated, its proteins unwind and restructure, creating a thicker final texture. Then, when it cools to the right temperature (about 110°F), you add a small amount of existing yogurt containing live active cultures.
These bacteria—Lactobacillus bulgaricus and Streptococcus thermophilus—get to work, feasting on the lactose in the milk and producing lactic acid. That acid causes the milk proteins to coagulate and thicken, transforming liquid milk into silky, tangy yogurt.
The magic happens during the incubation period, when the mixture is kept warm for several hours. The longer it incubates, the tangier and thicker it becomes. You’re not just making food; you’re hosting a bacterial party, and the result is delicious.
Instructions
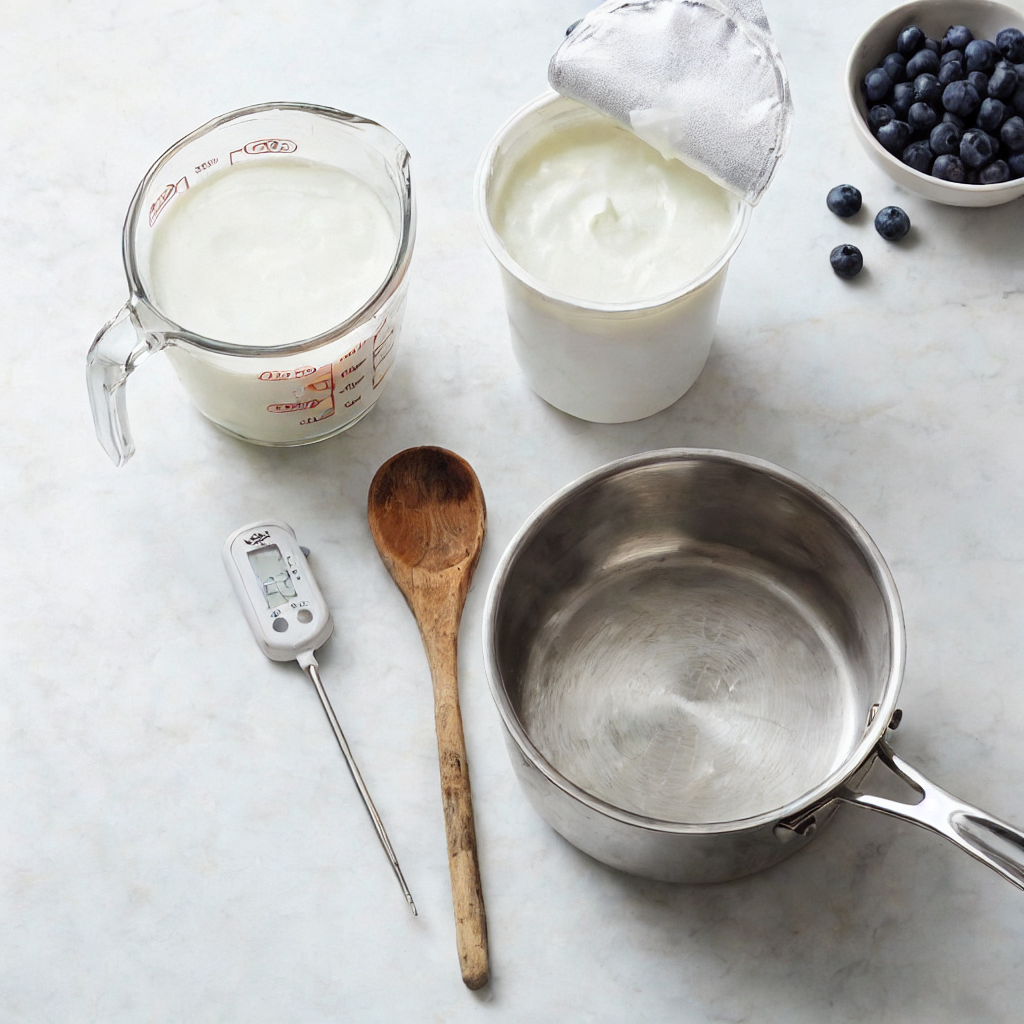
Heat the Milk
Pour the milk into a heavy-bottomed saucepan. Heat it over medium heat, stirring occasionally to prevent scorching, until it reaches 180°F (82°C) on a kitchen thermometer.
This step denatures the proteins, which helps create a thicker yogurt. If you don’t have a thermometer, heat until the milk is steaming and small bubbles form around the edges—do not let it come to a full boil.
Cool the Milk
Remove the pot from the heat and let the milk cool to 110°F (43°C). You can speed this up by placing the pot in an ice bath or cold water, stirring occasionally. Patience here is key—if the milk is too hot, it will kill the good bacteria; too cold, and they won’t activate.
Temper the Starter
In a small bowl, place the 2 tablespoons of plain yogurt with live active cultures. Add a few tablespoons of the warm (110°F) milk and whisk until smooth. This tempers the yogurt and prevents temperature shock.
Combine
Pour the tempered yogurt mixture back into the pot of warm milk. Whisk gently but thoroughly to ensure the cultures are evenly distributed throughout the milk.
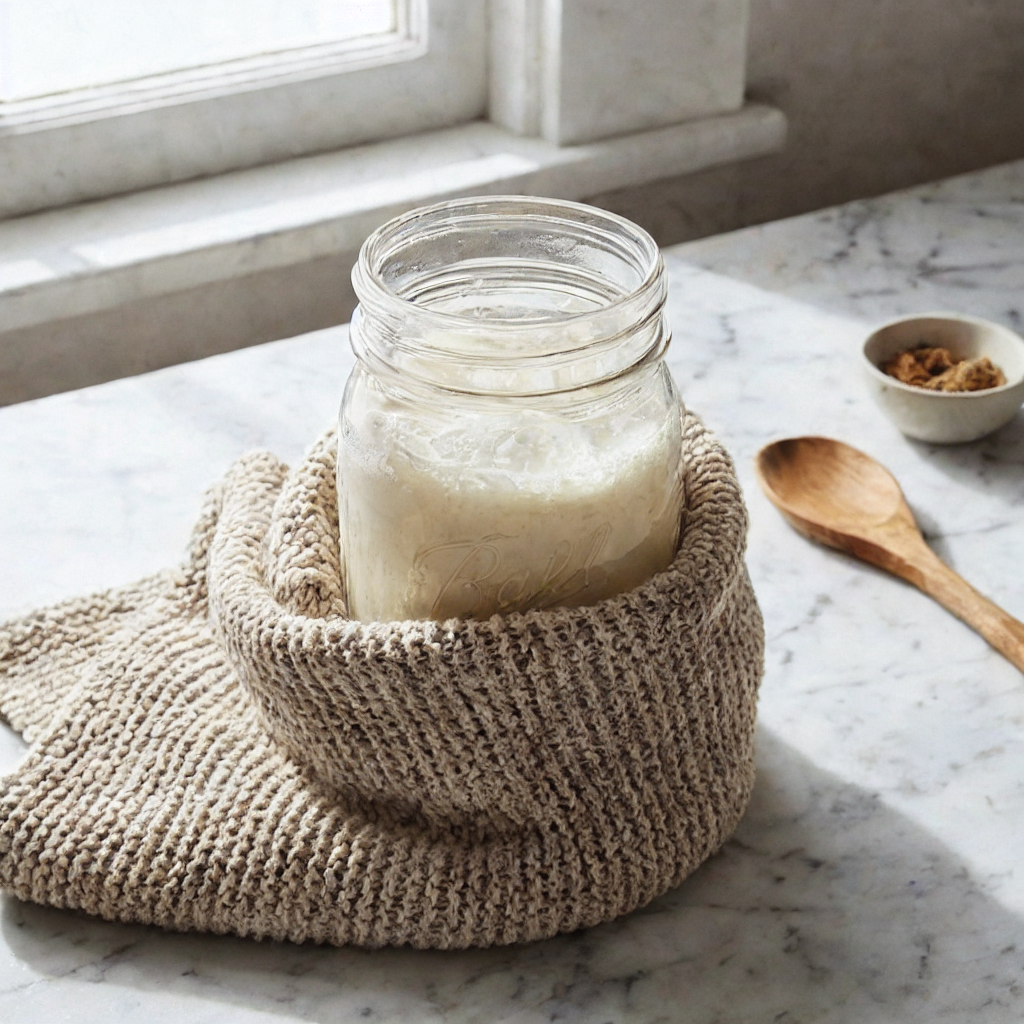
Incubate (The Magic Step)
Pour the milk mixture into a clean glass jar or container with a lid. Now you need to keep it warm (around 110°F) for 6-12 hours to allow the cultures to work. Here are some foolproof methods:
- Oven with light on: Place the jar in the oven with the oven light on (do not turn the oven on). The light bulb provides gentle, consistent warmth.
- Cooler with warm water: Place the jar in a small cooler and fill with warm water (around 110°F) until it reaches the level of the yogurt. Close the cooler.
- Instant Pot: Use the yogurt setting if you have one.
- Wrapped in a towel: Wrap the jar in a thick towel or blanket and place it in a warm spot (like near a radiator or in a sunny window).
Let it incubate undisturbed for at least 6 hours. The longer it incubates, the tangier and thicker it becomes.
Check for Doneness
After 6-8 hours, gently tilt the jar. The yogurt should be set, thick, and custard-like. It may have a thin layer of yellowish liquid (whey) on top—that’s normal and can be stirred in or poured off.
Refrigerate
Place the lid on the jar and transfer the yogurt to the refrigerator. Chill for at least 4 hours to stop the fermentation process and allow it to fully set. It will continue to thicken as it cools.
Save Some for Next Time
Before you dig in, spoon out 2 tablespoons of your homemade yogurt into a small container. This becomes your starter for your next batch. Label it and keep it in the fridge for up to a week.
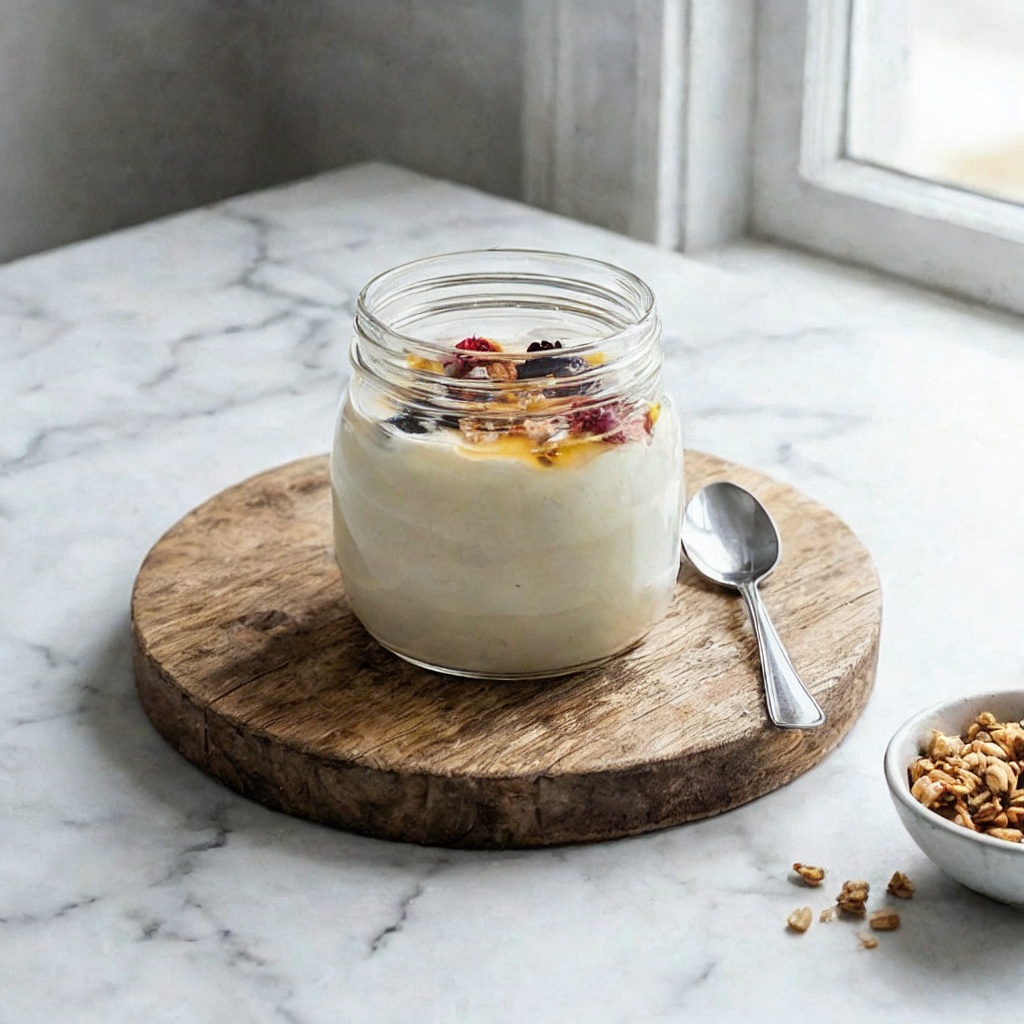
Serve and Enjoy
Spoon your beautiful homemade yogurt into a bowl. Add honey, fresh berries, granola, or anything your heart desires. Taste that tangy, creamy perfection and feel immensely proud of yourself.
Store
Keep your homemade yogurt refrigerated in an airtight container for up to 2 weeks.
Pro-Tips for Yogurt Greatness
- Use Whole Milk for Creamiest Results: Whole milk yields thick, luxurious yogurt. Lower-fat milks work but will be thinner. For extra thickness, add ¼ cup of powdered milk to the milk before heating.
- Temperature Matters: Too hot kills the cultures; too cold and they won’t activate. An instant-read thermometer is your best friend here.
- Patience is a Virtue: The longer you incubate, the tangier and thicker your yogurt becomes. If you like mild yogurt, go for 6-7 hours. For serious tang, let it go 10-12 hours.
- Save Your Starter: Always reserve a few tablespoons of your homemade yogurt to start the next batch. It’s like having a never-ending yogurt supply.
- Strain for Greek Yogurt: For thick, Greek-style yogurt, line a strainer with cheesecloth or a clean kitchen towel and place it over a bowl. Spoon in your yogurt and let it drain in the refrigerator for 2-4 hours. The longer it drains, the thicker it gets. Save the whey—it’s great in smoothies!