Entertaining should be fun, not frantic. The sight of a beautifully abundant snack board—or charcuterie board, if you want to be fancy—has a magical way of making any gathering feel special, welcoming, and effortlessly stylish. But for many, the idea of assembling one is intimidating. Where do you start? How much do you buy? This guide is here to demystify the process.
Think of it not as a rigid recipe, but as a foolproof formula and a permission slip to play with your food. We’ll break down the components into simple categories, offer easy shopping lists, and walk you through the relaxing, creative process of building a board that looks like it came from a gourmet shop but is truly achievable for anyone.
The goal is abundance, variety, and most importantly, deliciousness. Let’s build a centerpiece that will have your guests gathering around in awe (and digging in with joy).
The Snack Board Philosophy: Balance, Variety, and Ease
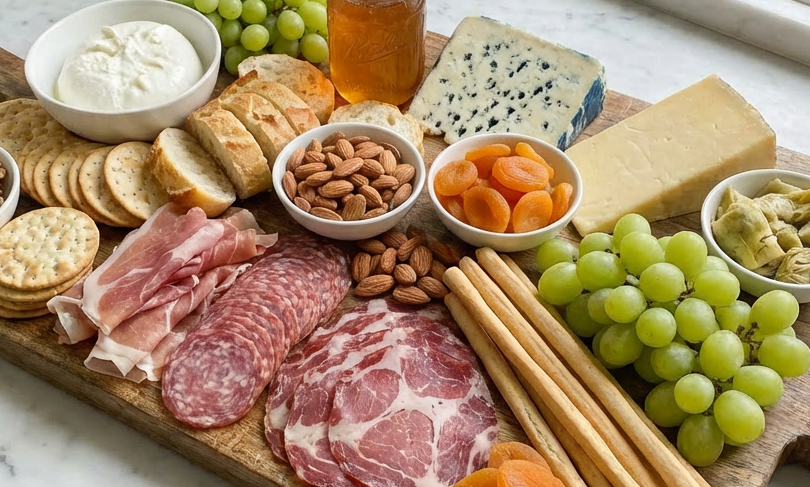
A great snack board is a study in contrasts and complements. It's about offering a little something for everyone and creating delightful flavor combinations in every bite. The foundation is built on a balance of textures (creamy, crunchy, chewy) and flavors (salty, sweet, tangy, rich).
You don't need expensive, exotic items. A few well-chosen staples from your local grocery store can create a stunning display. The key is shopping with categories in mind: something cheesy, something meaty, something crunchy, something sweet, something briny, and something for dipping. Arrangement is your secret weapon. Start with anchors like cheese wedges and small bowls for dips, then fill in the gaps with piles and clusters.
Let the colors and shapes guide you—a board should look bountiful, not bare. Remember, there are no mistakes here. If it tastes good together, it belongs on the board.
The Formula & Shopping List (Serves 6-8)
Use this as your flexible blueprint. Choose 1-2 items from each category.
Step-by-Step Assembly Instructions
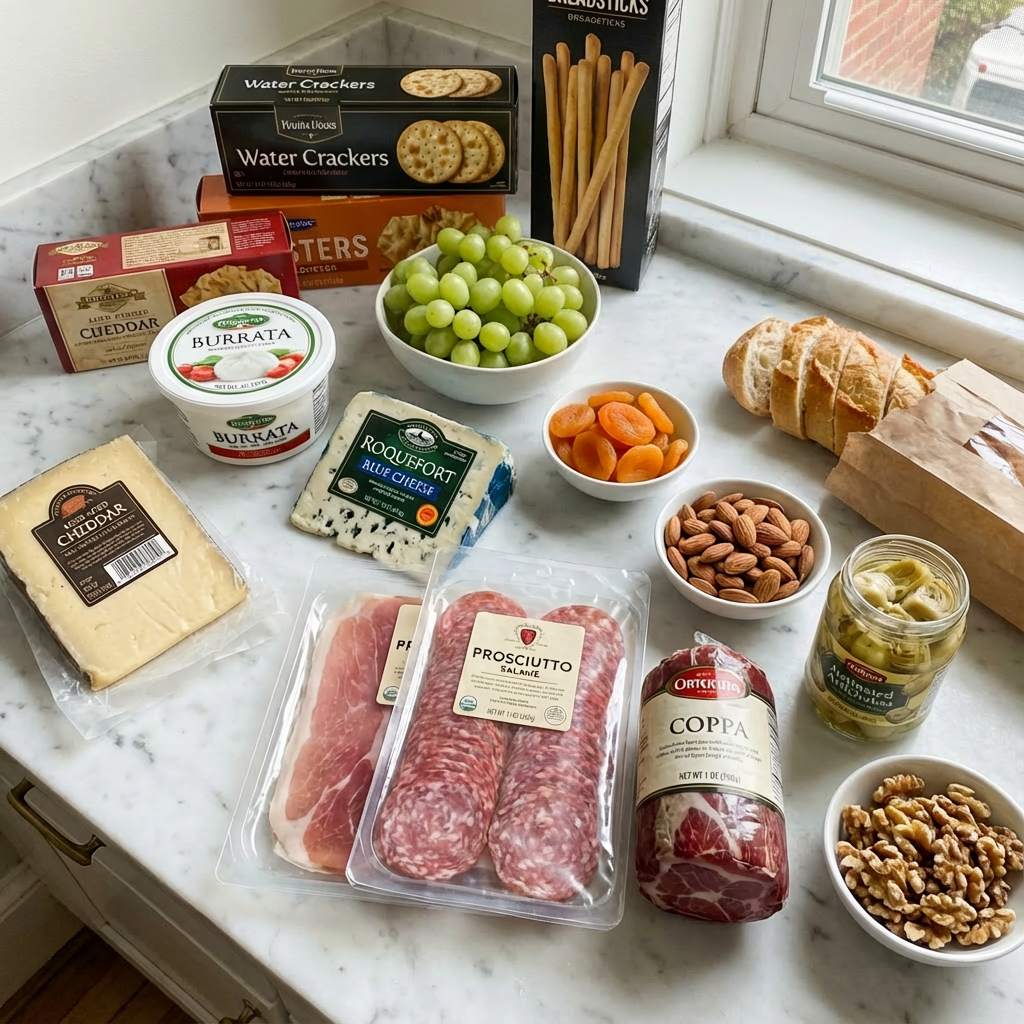
Gather & Prep Your Components
Choose a large board, platter, or even a clean baking sheet. Take all cheeses out of the fridge 30-60 minutes before serving so they can come to room temperature (this maximizes flavor and spreadability). Wash and dry fruits. Slice apples/pears and toss with a little lemon juice to prevent browning. Slice baguettes. Have small bowls or ramekins ready for loose items like olives or dips.
Place Your Anchors
Start by placing your small bowls on the board, spacing them out. Then, arrange your cheese wedges and blocks around the board. Cut a few slices or crumble a bit of one cheese to make it inviting. Variety in cheese shape is visually appealing.
Add the Meats
Fan out sliced meats or arrange them in loose, casual folds or rolls near the cheeses. Cluster different meats together for a plentiful look.
Fill in with Crunch & Bulk
Place piles of crackers and bread in a few different areas. Tuck in breadsticks. This creates "bread zones" so guests aren't all reaching for the same spot.
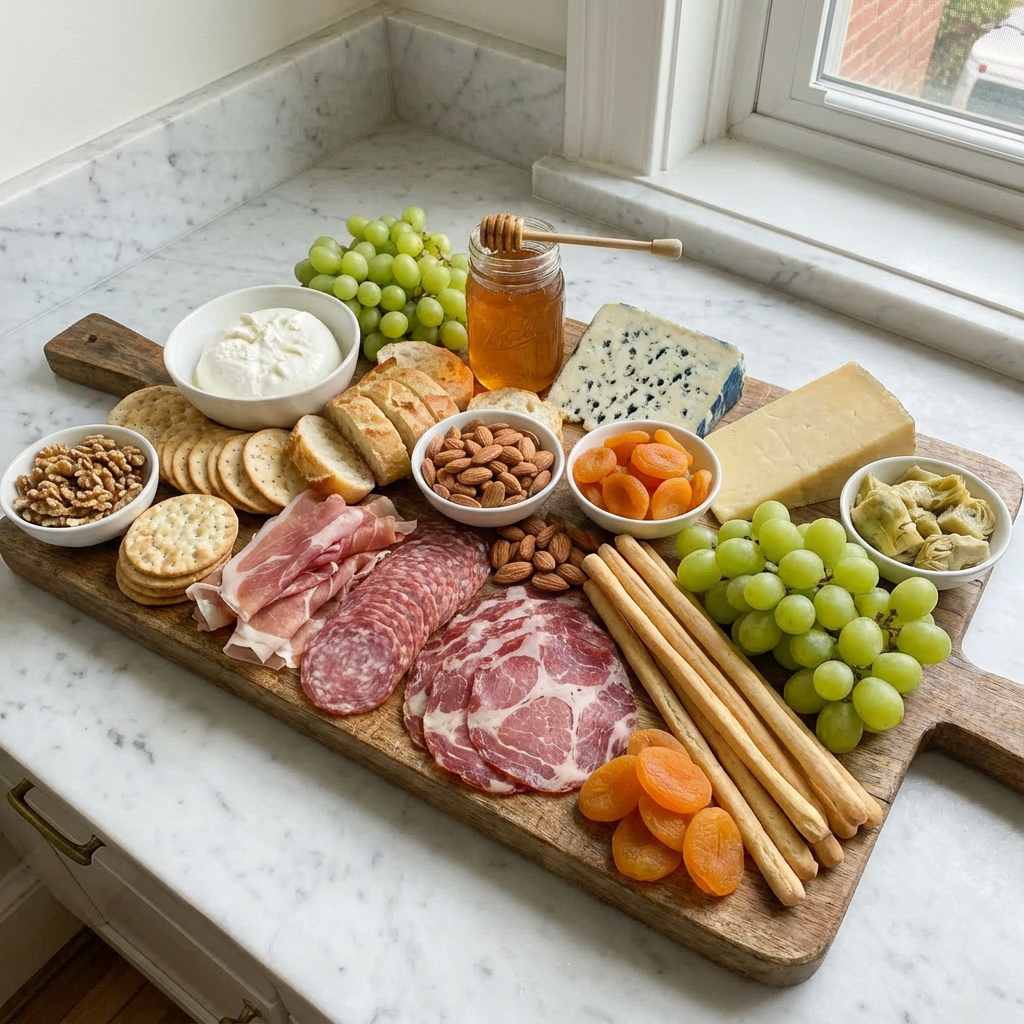
Scatter the Fruits, Nuts, and Extras
Now, fill all the empty spaces. Create clusters of grapes, piles of dried fruit, small mounds of nuts, and spoonfuls of jam or honey. Scatter olives and cornichons. The goal is to cover the board surface, creating an abundant, "grazing" feel.
Final Touches & Garnish
Add utensils: small cheese knives, spreaders, and cocktail picks for olives. Tuck in fresh herbs like rosemary or thyme for a beautiful, fragrant garnish. Add a drizzle of honey over a cheese wedge or a sprinkle of flaky salt over nuts.
Pro Tips for Effortless Entertaining
- Shop Smart: The grocery store olive bar, pre-sliced meat packs, and a well-stocked cheese section are your best friends.
- No Board? No Problem: Use a large cutting board, a ceramic platter, a slab of slate, or even a clean piece of marble.
- Make-Ahead: You can prep components (slice cheese, wash fruit, fill bowls) a few hours ahead. Cover the board loosely with plastic wrap and refrigerate. Add crackers and bread right before serving to keep them crisp.
- Scale It: For a cozy date night, use a small board with just one cheese, one meat, some crackers, and fruit. The formula scales perfectly.
- The Rule of Odd Numbers: Arranging items in groups of 3 or 5 is more visually appealing than even numbers.
Most importantly, relax and have fun with it. A snack board is a generous, welcoming gesture, and its imperfection is part of its charm.
Frequently Asked Questions (FAQ):
I'm on a tight budget. Can I still make an impressive board?
Absolutely! Focus on value. Choose one excellent cheese (like a sharp cheddar) and one affordable meat (like a salami). Use in-season fruits and vegetables (like apples, carrots, or radishes). Bulk it out with affordable crackers, popcorn, and mixed nuts from the bulk bin. A little creativity goes a long way.
How much food should I buy per person?
Cheese: 2-3 ounces per person
Meat: 2-3 ounces per person
Crackers/Bread: 3-4 pieces per person
Accoutrements (fruit, nuts, etc.): ¼ to ⅓ cup per person
It's always better to have a little extra!
Can I make a snack board ahead of time?
Yes, with smart prep! You can slice cheeses, wash and dry fruits, fill small bowls with dips and olives, and even arrange meats on the board. Cover the entire board tightly with plastic wrap and refrigerate for up to 4-6 hours. Add crackers, bread, and any delicate fresh herbs RIGHT BEFORE serving to prevent sogginess.
What are some good vegetarian alternatives to cured meats?
Plenty! Focus on a variety of cheeses. Add hearty elements like marinated artichoke hearts, roasted peppers, sundried tomatoes, seasoned chickpeas, falafel bites, or vegetarian pâté. Smoked almonds or savory roasted nuts also add a "meaty" depth of flavor.
My board looks a little sparse. How do I make it look fuller?
Use the "cluster and fill" technique. Don't spread things out thinly. Group items like nuts and dried fruit in small, abundant piles. Use fresh herbs (like bunches of grapes on the vine or rosemary sprigs) to take up visual space. Fill every gap with something, even if it's just a few extra crackers tucked in.
Can I make a kid-friendly snack board?
Definitely! Kids love boards. Use familiar cheeses (mozzarella pearls, mild cheddar cubes), sliced turkey or ham rolls, pretzels, goldfish crackers, apple slices, grapes, berries, and small cookies. Use fun cookie cutters on cheeses and meats. Skip the strong olives and blue cheese.