No party spread is truly complete without a platter of deviled eggs. This iconic appetizer sits at the intersection of simplicity and perfection: a humble hard-boiled egg transformed into a vehicle for creamy, tangy, savory bliss. While endlessly adaptable, mastering the classic version is a essential culinary rite of passage.
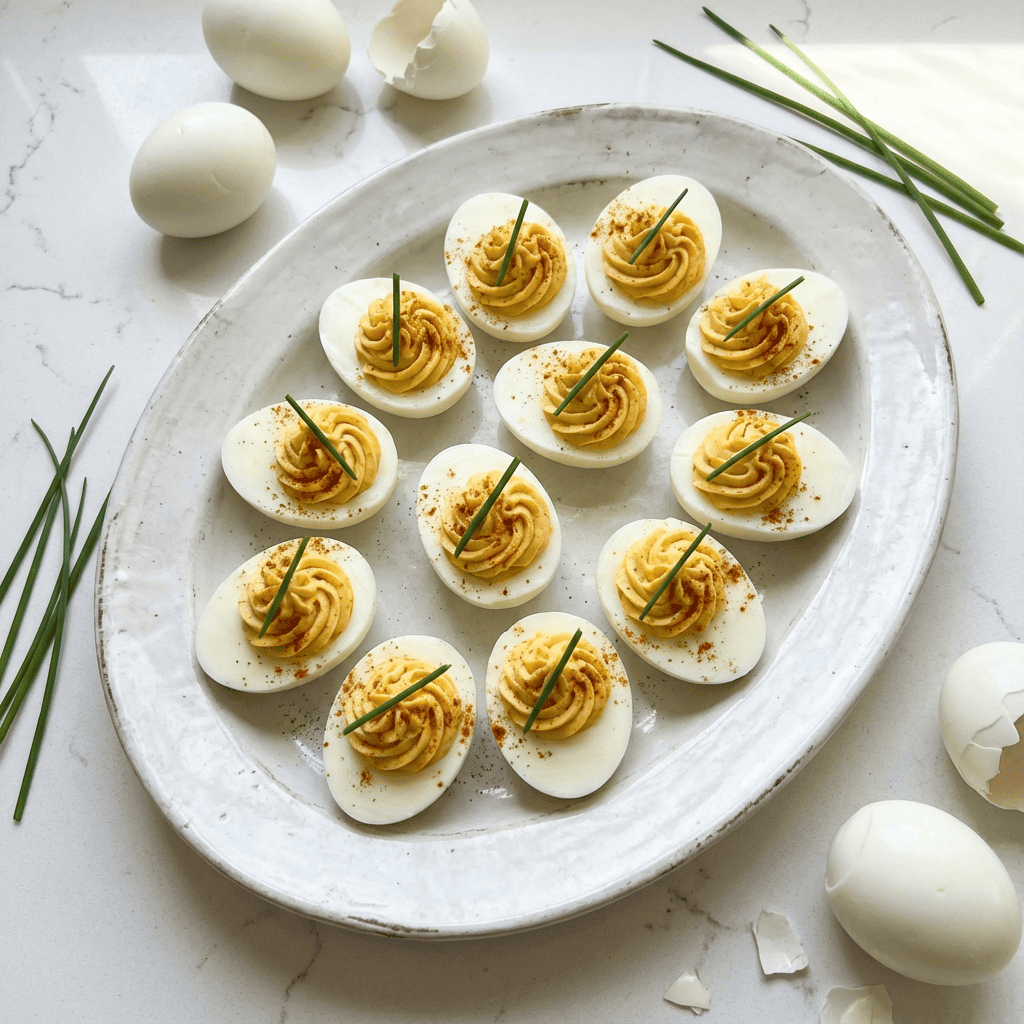
This recipe delivers that timeless ideal—a velvety-smooth filling that’s rich but not heavy, perfectly seasoned, and piped into glossy white cups just waiting for that final dusting of paprika. They’re the bite-sized proof that the best party foods are often the most straightforward, and with a few key techniques, you can ensure yours are the ones guests rave about.
The Science of the Perfect Hard-Boil & Emulsified Filling
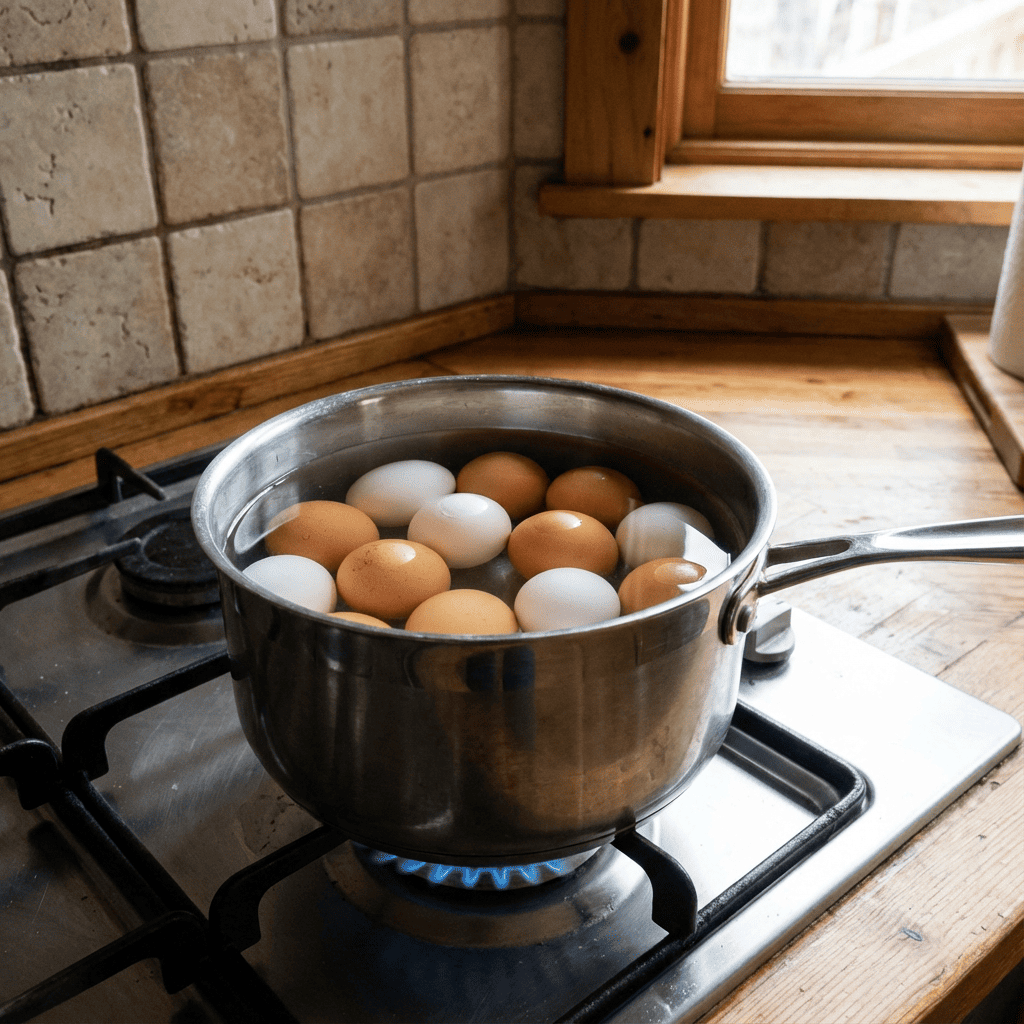
The journey to deviled egg excellence begins with the egg itself. The goal is a fully set yolk without the dreaded gray-green sulfur ring. Starting eggs in cold water and bringing them to a boil ensures even heating from shell to core, minimizing protein shock and cracks.
The immediate ice bath after cooking is non-negotiable; it rapidly halts the cooking process, prevents overcooking, and creates a temperature shock that contracts the egg inside its shell, making peeling infinitely easier. The filling’s texture is a study in emulsion.
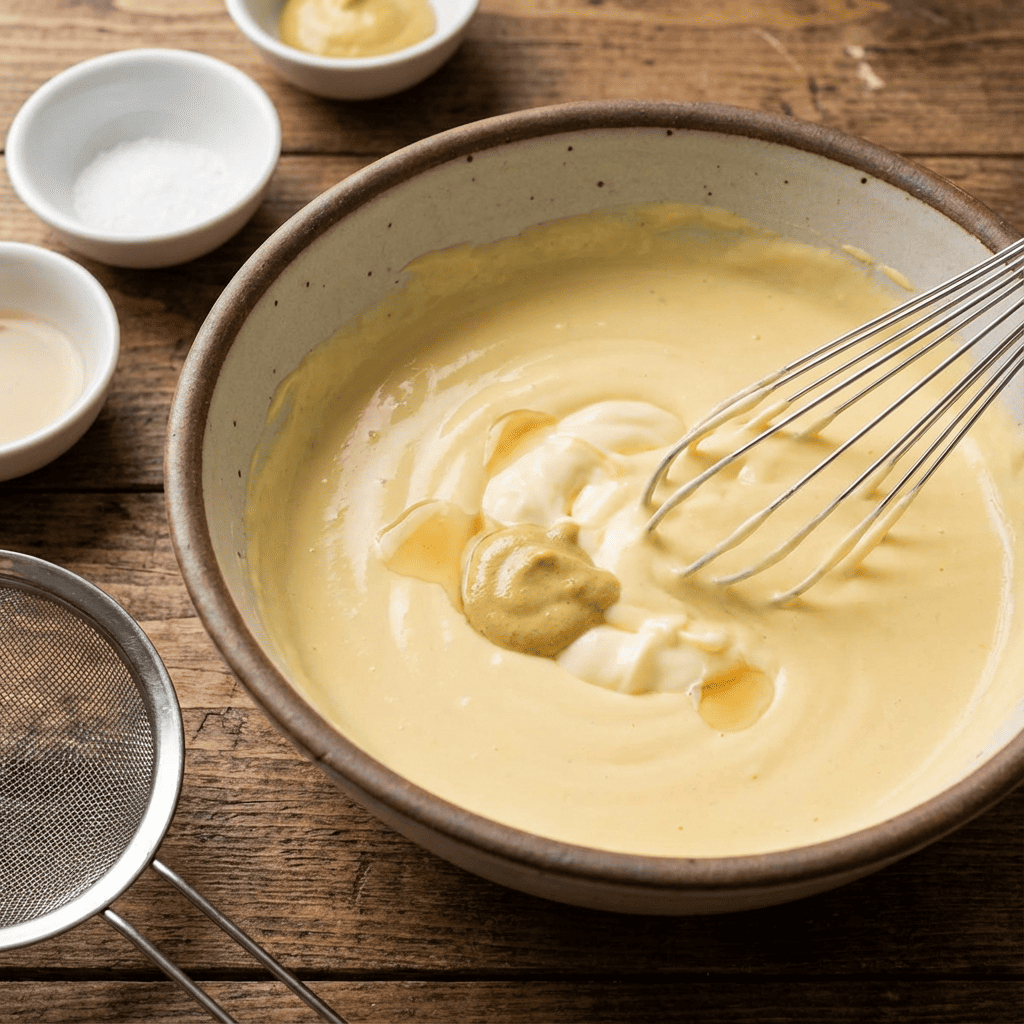
The crumbled egg yolks are rich in fat and lecithin, a powerful natural emulsifier. When mixed with the water and fat in mayonnaise and the acidic tang of mustard and vinegar, the lecithin helps bind these elements into a cohesive, creamy, and stable mixture that won’t separate. Mashing while still slightly warm and pressing through a sieve guarantees the signature ultra-smooth, lump-free base that’s essential for elegant piping.
Instructions
Perfect Hard-Boiled Eggs
Place eggs in a single layer in a large saucepan. Cover with cold water by at least 1 inch. Bring to a full, rolling boil over high heat. Once boiling, immediately cover the pot and remove it from the heat. Let stand for 12 minutes.
The Ice Bath
While eggs stand, prepare a large bowl of ice water. After 12 minutes, use a slotted spoon to transfer the hot eggs directly into the ice bath. Let them cool completely, about 15 minutes.
Peel & Halve
Gently tap each egg on the counter and roll to crackle the shell. Peel under cool running water to help remove shell fragments. Slice each peeled egg in half lengthwise.
Make the Filling
Gently pop the yolks into a medium bowl. Arrange the hollow egg white halves on a serving platter. Mash the yolks with a fork until they resemble fine crumbs. For an ultra-smooth filling, press the mashed yolks through a fine-mesh sieve into the bowl.
Season & Mix
To the yolks, add mayonnaise, mustard, vinegar, salt, and pepper. Stir vigorously with a spoon or spatula until completely smooth and creamy. Taste and adjust seasoning.
Fill the Eggs
Spoon the filling into a piping bag fitted with a star or large round tip, or into a zip-top bag with a corner snipped off. Pipe the filling generously into each egg white half. Alternatively, spoon the filling in with a teaspoon.
Garnish & Chill
Lightly dust the tops with paprika. Garnish with a tiny piece of fresh chive or parsley if desired. Cover loosely with plastic wrap and refrigerate for at least 30 minutes before serving to allow flavors to meld.
Pro-Tip for Make-Ahead
You can prepare the components up to 2 days ahead. Store peeled, halved egg whites and the yolk filling separately in airtight containers in the fridge. Pipe or fill just before serving.
Pro-Tips for Flawless Deviled Eggs Every Time
- Use Slightly Older Eggs: Eggs that are 7-10 days old peel more easily than super-fresh ones.
- The Ice Bath is Mandatory: This is the single biggest factor in easy peeling and preventing rubbery whites.
- Sieve for Supreme Smoothness: Pressing the yolks through a sieve is the secret restaurant trick for an impeccably velvety filling with no graininess.
- Season Aggressively: The filling should taste bold on its own, as it’s mellowed by the plain egg white. Don’t be shy with salt, pepper, and acidity.
- The Mayo Matters: Use a high-quality, full-fat mayonnaise like Hellmann’s or Duke’s for the best flavor and stability.
- Get Creative with Mix-Ins: Fold in finely chopped pickles (or pickle relish), crisp cooked bacon, horseradish, sriracha, or fresh herbs for endless variations.
- Serving Savvy: Use a deviled egg platter with indentations to keep them from sliding, or secure them on a regular platter with a bed of lettuce or parsley.
Master this classic, and you hold the key to a lifetime of successful gatherings.