nan
Sourdough Is a Scam: How to Bake Artisan Bread in 2 Hours (No Starter)
The Sourdough Lie: Time vs. Taste
Let's be honest, the internet is overflowing with sourdough recipes. They promise tangy, complex flavors and Instagram-worthy loaves. But they also demand weeks of starter cultivation, meticulous feeding schedules, and a level of commitment that rivals raising a small child. Are those subtle flavor nuances *really* worth the effort? I used to think so. I spent months nurturing a starter, only to end up with more hockey pucks than edible bread. The truth is, you can achieve incredible artisan bread at home, with a fraction of the time and hassle, and without the sourdough drama.
The secret? Understanding the fundamental principles of bread baking and leveraging a few clever techniques. We're talking about achieving that beautiful crust, that airy crumb, and that satisfying chew, all in about two hours. Forget the weeks-long fermentation process. We're going to unlock amazing flavor using readily available ingredients and a streamlined approach. This isn't about cutting corners; it's about working smarter, not harder, to create truly exceptional bread.
The Magic of the Poolish: Flavor Without the Wait
The key to our quick artisan bread lies in a pre-ferment called a poolish. Think of it as a mini-starter, but one that's ready to go in a matter of hours, not weeks. A poolish is simply a mixture of equal parts flour and water, with a tiny pinch of yeast. This mixture ferments for a few hours, developing complex flavors and aromas that will translate directly into your final loaf. It's the secret weapon that allows us to bypass the lengthy sourdough process without sacrificing that characteristic depth of flavor.
The poolish works by giving the yeast a head start. Instead of adding yeast directly to the main dough, we allow it to thrive in a controlled environment, consuming the sugars in the flour and producing flavorful byproducts. This pre-fermentation process not only enhances the taste of the bread but also improves its texture, resulting in a lighter, airier crumb. It's a win-win situation, and it's far less demanding than maintaining a sourdough starter.
Gather Your Arsenal: Essential Ingredients and Equipment
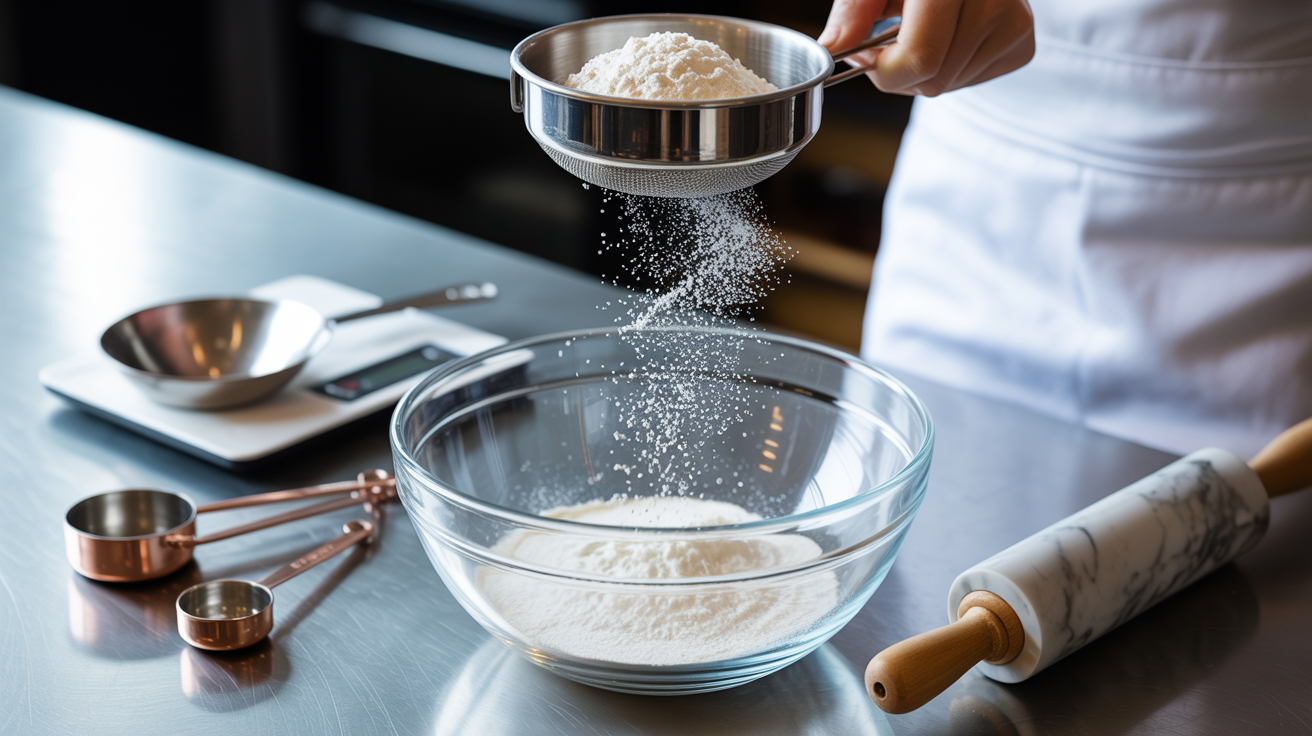
Before we dive into the recipe, let's make sure you have everything you need. The beauty of this method is that it requires minimal specialized equipment. You'll need a good quality flour – bread flour is ideal for its high gluten content, which will give your bread structure and chew. All-purpose flour will also work, but the results may be slightly less impressive. You'll also need water, yeast (instant or active dry), and salt. That's it! No fancy ingredients or obscure additives required.
As for equipment, a large mixing bowl, a kitchen scale (for accurate measurements), a bench scraper, and a Dutch oven are your best friends. The Dutch oven is crucial for creating that bakery-style crust. It traps steam inside, which helps the bread rise fully and develop a beautiful, crackly exterior. If you don't have a Dutch oven, you can use a baking stone or sheet pan with a tray of water underneath to create a similar steamy environment. A good pastry brush is also helpful for applying egg washes or glazes, if desired.
The Two-Hour Timeline: A Step-by-Step Guide
Now for the fun part: baking! Let's break down the two-hour process into manageable steps. First, prepare your poolish. Combine equal parts flour and water with a tiny pinch of yeast in a bowl. Mix well, cover, and let it sit at room temperature for about an hour. You'll notice it becoming bubbly and slightly foamy – that's the yeast doing its thing.
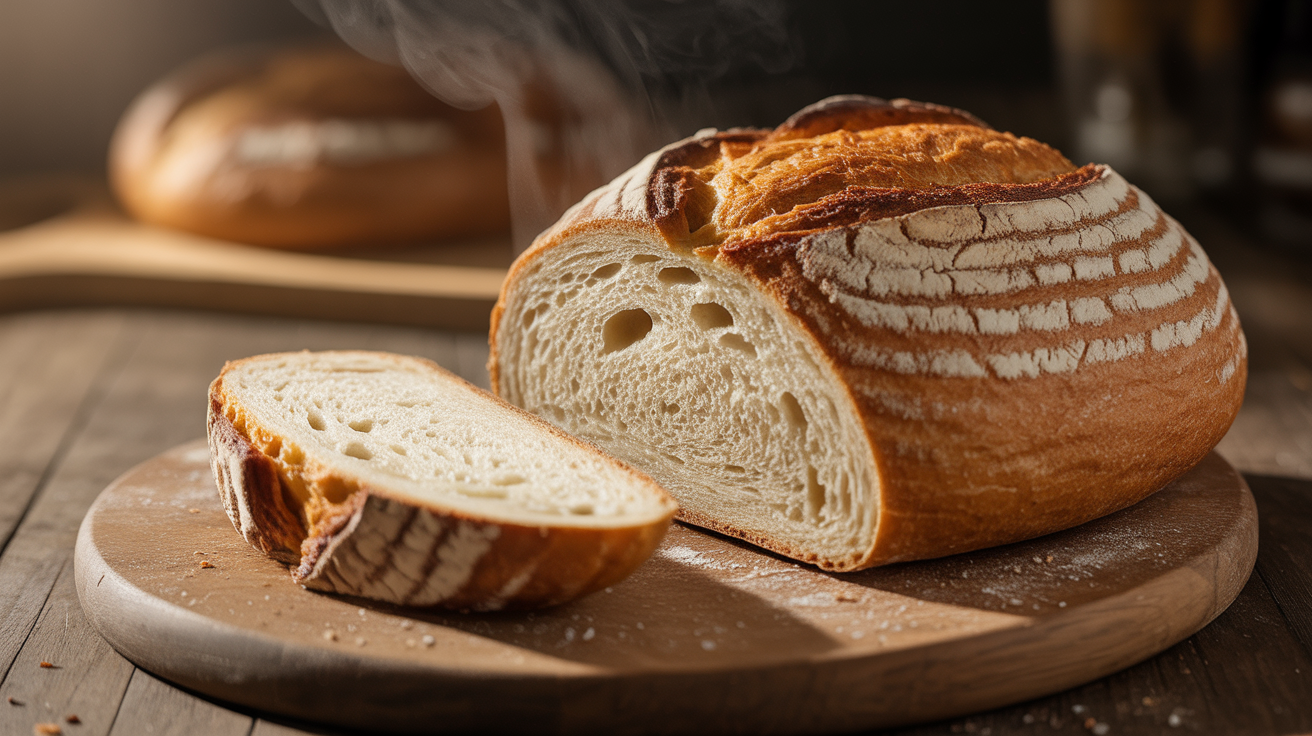
Next, combine the poolish with the remaining flour, water, and salt in a large bowl. Mix until a shaggy dough forms. Let the dough rest for 30 minutes (this is called autolysing), which allows the flour to fully hydrate and develop gluten. After the rest, knead the dough for a few minutes until it becomes smooth and elastic. Shape the dough into a round or oval, place it in a well-floured banneton basket (or a bowl lined with a floured towel), and let it rise for another 30 minutes. While the dough is rising, preheat your Dutch oven in a 450°F (232°C) oven. Finally, score the top of the dough with a sharp knife or lame, carefully transfer it to the hot Dutch oven, cover, and bake for 20 minutes. Remove the lid and bake for another 15-20 minutes, or until the crust is deeply golden brown. Let the bread cool completely on a wire rack before slicing and enjoying.
Troubleshooting Your Loaf: Common Problems and Solutions
Even with the best recipe, things can sometimes go awry. If your bread is dense and doesn't rise properly, it could be due to several factors. First, make sure your yeast is fresh and active. Expired yeast won't do the job. Second, ensure you're using the correct amount of flour and water. Accurate measurements are crucial for success. Finally, don't over-knead the dough, as this can toughen the gluten and prevent it from rising properly.
If your crust is too pale, try increasing the baking time or temperature slightly. You can also brush the loaf with an egg wash before baking to promote browning. If your crust is too dark, reduce the baking time or temperature, or cover the loaf with foil during the last few minutes of baking. Remember, baking is a science, but it's also an art. Don't be afraid to experiment and adjust the recipe to suit your preferences and your oven.
Beyond the Basic Loaf: Flavor Variations and Add-Ins
Once you've mastered the basic recipe, the possibilities are endless. You can experiment with different types of flour, such as whole wheat or rye, to add depth and complexity to the flavor. You can also incorporate various add-ins, such as herbs, cheese, olives, or nuts, to create unique and flavorful loaves. Imagine a rosemary and sea salt bread, a cheddar and jalapeno bread, or a walnut and cranberry bread. The only limit is your imagination.
Another fun variation is to experiment with different scoring patterns. Scoring not only allows the bread to expand properly during baking but also adds a decorative touch. You can create simple slashes, intricate designs, or even use stencils to create custom patterns. A well-scored loaf is a thing of beauty, and it's a great way to impress your friends and family.
The Perfect Pairing: Serving Suggestions and Culinary Companions
Freshly baked bread is a delight on its own, but it's even better when paired with the right accompaniments. A simple slice of bread with butter and a sprinkle of sea salt is a classic combination that never gets old. You can also use your homemade bread to make sandwiches, toast, or croutons. It's incredibly versatile and can be incorporated into countless dishes.
For a more sophisticated pairing, try serving your bread with cheese, charcuterie, or a hearty soup. The crusty texture and complex flavors of the bread complement these dishes perfectly. A warm loaf of bread with a bowl of creamy tomato soup is the ultimate comfort food. And don't forget about dessert! A slice of toasted bread with Nutella or a scoop of ice cream is a simple yet satisfying treat. The possibilities are endless, so get creative and experiment with different pairings to find your favorites.
Embrace the Simplicity: Ditch the Sourdough Stress
So, there you have it: a foolproof method for baking artisan bread in just two hours, without the need for a finicky sourdough starter. This approach is not only faster and easier but also produces incredibly delicious results. You'll be amazed at the depth of flavor and the beautiful texture you can achieve with this simple technique. Forget the sourdough hype and embrace the simplicity of this method. You'll be baking incredible bread in no time, and you'll wonder why you ever bothered with sourdough in the first place.
Now it's your turn. Grab your flour, water, yeast, and salt, and let's get baking! Share your creations with us on social media using #QuickArtisanBread. We can't wait to see what you come up with. Happy baking!